SALES FORMS
Each time you make a sale, you will record it in QuickBooks using a form called “Sales form”. QuickBooks divided this forms into Invoices (when payment will receive in the future), or a Sales Receipt (if the payment is made at the time of sale).
The type of form that you will use (“Invoice” or “Sales Receipt”) will depend on if the collection of payment is going to be in the future or at the moment. If full payment of the invoice being received at the time, either cash, check or credit card, “Sales Receipt” will be filled, however, if the sale is on credit fill an “Invoice “.
Filling out an Invoice or a Sales Receipt in QuickBooks has the same procedure: customer information should be recorded first, date, payment terms, followed by items, a description of the charges, price per item, etc.
Sales Receipt
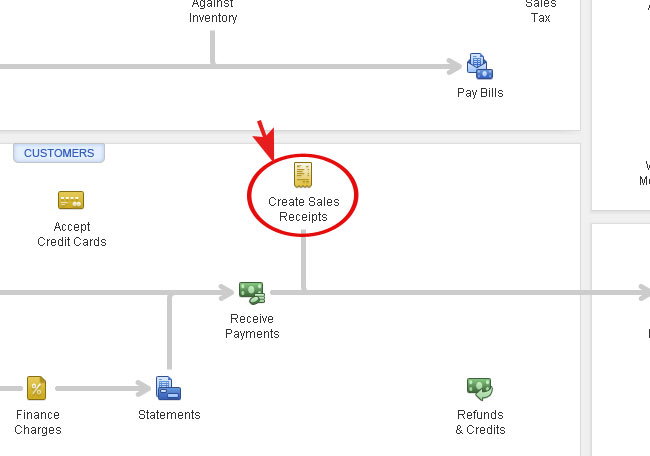
To see a sample of sales receipt in QuickBooks:
- On the Home, click Create Sales Receipts.
- Click Previous (1 time) to view the previously sale (Sample Company).
Invoice Form
To see a sample of Invoice in QuickBooks:
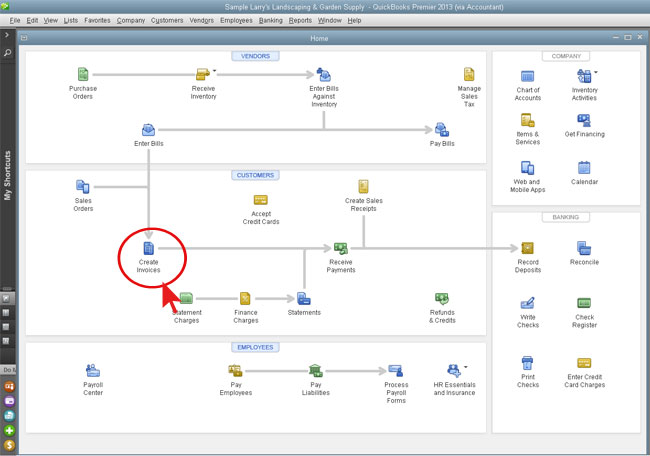
- On the Home, click Create Invoice.
- Click Previous (1 time) to view the previously sale (Sample Company).
Filling The Sales Form
Both forms follow the same procedure; the only difference is the due date in case of the Invoice and the top of the forms.

Invoice
In the body of the sales form you will record per line, the product or service you provide, and the amount your customer owes for that item. Each different item that is charged to the customer shall be recorded separately.
However, the items are not just the products or services you sell or offer; it can be anything you want to detail on the invoice: discounts, subtotal, sales tax, etc.
A. To enter customer information on the Sales Form:
- From Home page, click the options Create Invoices or Create Sales Receipt.
- From the Customer/Job list, click the arrow next to the drop-down list to open the names of your customers.
- In the Template field, select the name of the template from the drop-down list options that you are using for your invoices.
- If you have in preference charge time or costs, the window pops ups “Billable Time/Costs” , select Exclude and click OK
B. To complete the lines that makes up the content of the Invoice:
- In the area of item type ” Design”
- Press “Tab“
- Type 2 in the column “QUANTITY”.
- If the item price is already set for you when you created the item , QuickBooks will automatically calculate it , otherwise you will have to do it manually , in our example , type 55 in “RATE “.

Review and Completing The Sales Form
To complete and record the sales form:
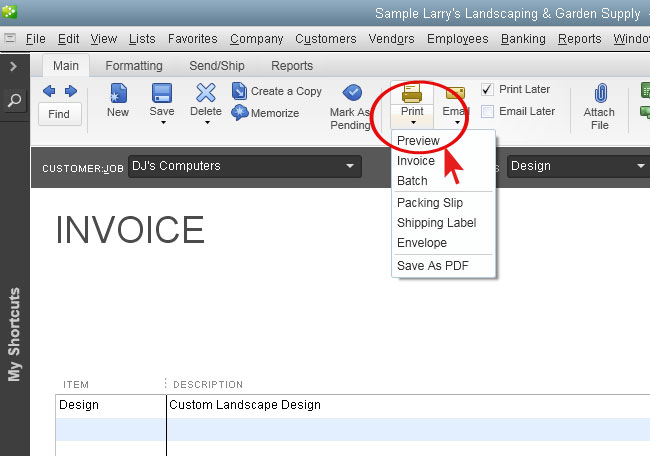
- Click the Print Preview button near the top of the screen.
- Review Sales Form.
- Whether you want to correct or if the bill is correct, click Close.
- If is incorrect, you can make the corrections.
- If is correct, you can record the sale save it and print it.
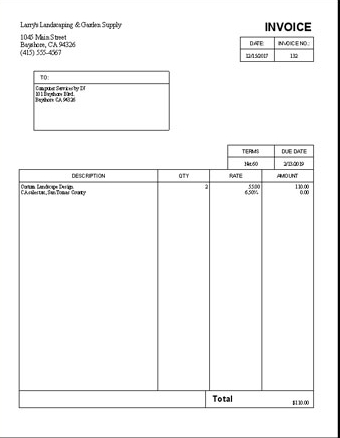
QuickBooks will record the invoice in accounts receivable register, in the case of Invoices on credit; if it is a sales receipt, the program automatically assumes that it was paid, and it will record the amount received in “Undeposited Funds” until the physical deposit will be done at the bank. You also have the options to register directly at the bank the amount received (this can be done when the “preferences” option “Use Undeposited Funds as a default deposit to account” is over, we do not recommended it).
FACTURAS Y RECIBOS DE VENTAS
Cada vez que usted hace una venta, usted la registra en QuickBooks en lo que se denomina “Sales Form”. Estas formas, QuickBooks las ha dividido en “Invoices” (cuando el pago es a futuro), o un “Sales Receipt” (cuando el pago se realiza en el momento de la venta).
EL tipo de forma que usted se va a usar (“Invoice” o “Sales Receipt”) dependerá de su cobranza, si va a ser en el futuro o en el momento.
“Sales Receipt” Form
Para mostrar un ejemplo de “Sales Receipt” en QuickBooks
- Haga click en home “Create Sales Receipts”.
- Click “Previous” to see the last one (sample companies).

“Invoice” Form
Para mostrar un ejemplo de “Sales Receipt” en QuickBooks
- Haga click en home “Create Invoices”.
- Click “Previous” to see the last one (sample companies).
Llenar la Forma de Ventas
Ambas formas se rellenan igual, la diferencia de la cual deberá usar será el tiempo de la cobranza. En el cuerpo del documento usted va a registrar por línea, cada artículo o servicio que usted vende, conjuntamente con la cantidad que su cliente debe por ese artículo. Cada diferente artículo que se está cobrando, debe registrarse por separado,

Invoice
Pero “ítems” no son solamente los productos o servicios que usted vende u ofrece; puede ser cualquier cosa que usted quiera detallar en la facture: descuento, subtotal, cálculos de impuestos sobre las ventas, etc.
A. Para registrar la información en la forma:
- En el “Home”, seleccione las opciones “Create Invoices” o “Create Sales Receipt”.
- Seleccione el cliente del menu desplegable.
- Seleccione el ‘Template” de la forma del menu desplegable.
- Si en preferencias usted seleccionó “Billable Time/Costs”, seleccione “Exclude” y haga click en OK
B. Para completar el contenido de la factura:
- En el area de ítem escriba “Design”
- Presione “Tab”
- Escriba 2 en la columna de “QUANTITY”.
- Si el precio del artículo ya ha sido fijado por usted cuando creo el ítem, QuickBooks lo calculará automáticamente, de lo contrario usted tendrá que hacerlo manualmente, en nuestro ejemplo, escriba 55 en “RATE”.

Revisión, guardar e impresión de la forma
To complete and record the sales form:
- Haga click en el botón de “Print Preview” que está en la parte superior de la pantalla.
- REvise la forma.
- Bien sea para corregir o para salvarlo, debe cerrar la ventada de “Preview” .
- Si está incorrecta la puede corregir.
- Si está correcta la salva y la imprime.


QuickBooks registrará la factura en las cuentas por cobrar, en el caso de facturas a crédito; si es un recibo de venta de contado, automáticamente el programa asume que fue pagada, y registrará la cantidad recibida en “Undeposited Funds”, hasta que se haga el depósito físico en el banco; usted también puede hacer que QuickBooks registre directamente en el banco la cantidad recibida (esta opción puede hacerse cuando en “preferences” está apagada (“off”) la opción de “Use Undeposited Funds as a default deposit to account”, contablemente no lo recomendamos).


